Index of DIY face masks click here
Disclaimer! This mask has not been tested in a clinical setting. It is a candidate design that can be made at home quickly with a 3D printer and commonly available tools and materials. It should only be considered when commercially available and medically approved masks are not available. Just as its not recommended that doctors re-use the masks that they have, this is about doing the best you can with what you have at hand.
If you have commercial N95 masks please donate them to your local hospital and make a mask for yourself first.
If you have ways to make this design better (more effective, faster to build, etc) using materials available to you, please do it, test it, and share it.
Important: This design cannot be washed due to use of water-soluble glue. Please use heat-welding with soldering iron or water-resistant glue for a more permanent washable design.
Tools & Materials:
- 3D Printer with PLA filament.
- Thin cotton t-shirt or other air-permiable fabric (“fabric”).
- Filter material (see step 3).
- Non-toxic glue-stick or glue. Heat welding is also possible.
- Scissors or X-Acto Knife.
Step 1: Print the mask
Use 20% infill and rough setting for faster prints. ~1-2 hours to print, 17g of PLA. Light-colored filament is best, as dark colors will hide stains/soiling (we only had black PLA on-hand for this build).
Click here for STL File. Please copy and share. Special thank to David Troetschel of Wallfacer Design for making modification to the Copper3D design.
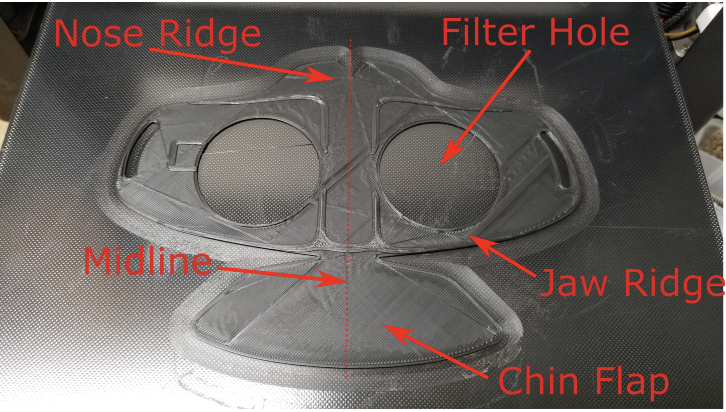
3D Printed mask with annotations
Step 2: Cut fabric to size
Important: fabric must be thin and air-permeable. Otherwise the mask will not allow sufficient ventilation when combined with the filter material.
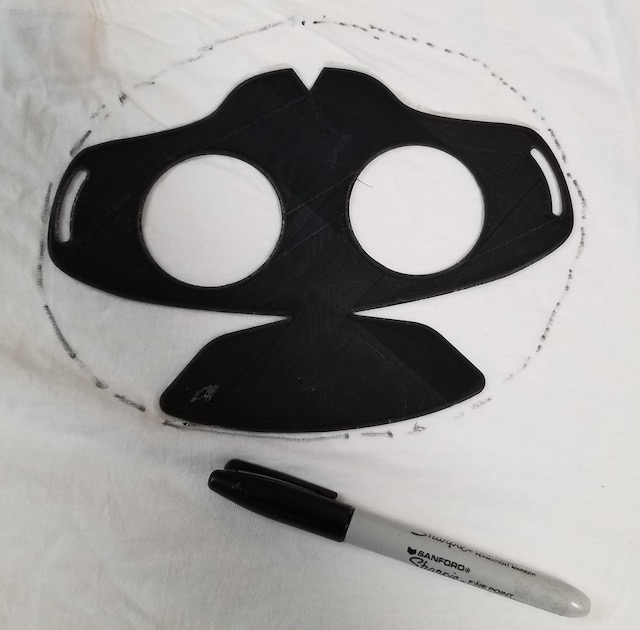
Trace out fabric cut line
- Place mask on fabric, use pencil or marker to trace out an oval around the mask. Be sure to leave about 1 inch (2.5cm) of fabric on top of the mask. Cut fabric with scissors.
Step 3. Find a filter material.
What Are The Best Materials for Making DIY Masks?
To achieve N95 compliance, a MERV 13 or higher filter material can be used.
“Medical masks and N95 respirator are widely used to protect against airborne diseases such as tuberculosis, SARS, MERS, avian and swine flues, and the recent emerging coronavirus (COVID-19). The filtration layer of these masks is made of meltblown (MB) PP (polypropylene) nonwoven electret – electrostatically charged media”…[read more]
If you cannot find special-purpose filter fabric, you can still make a reasonably effective mask. You must strike a balance between high filter efficiency (keep virus out) and low pressure (keep you breathing). If you have a new hepa filter material, this is ideal. Multiple layers of dense cotton will work. Soaking the outermost layer in a concentrated salt solution and allowing to dry may increase effectiveness against virus through de-activation. (see referenced paper below)
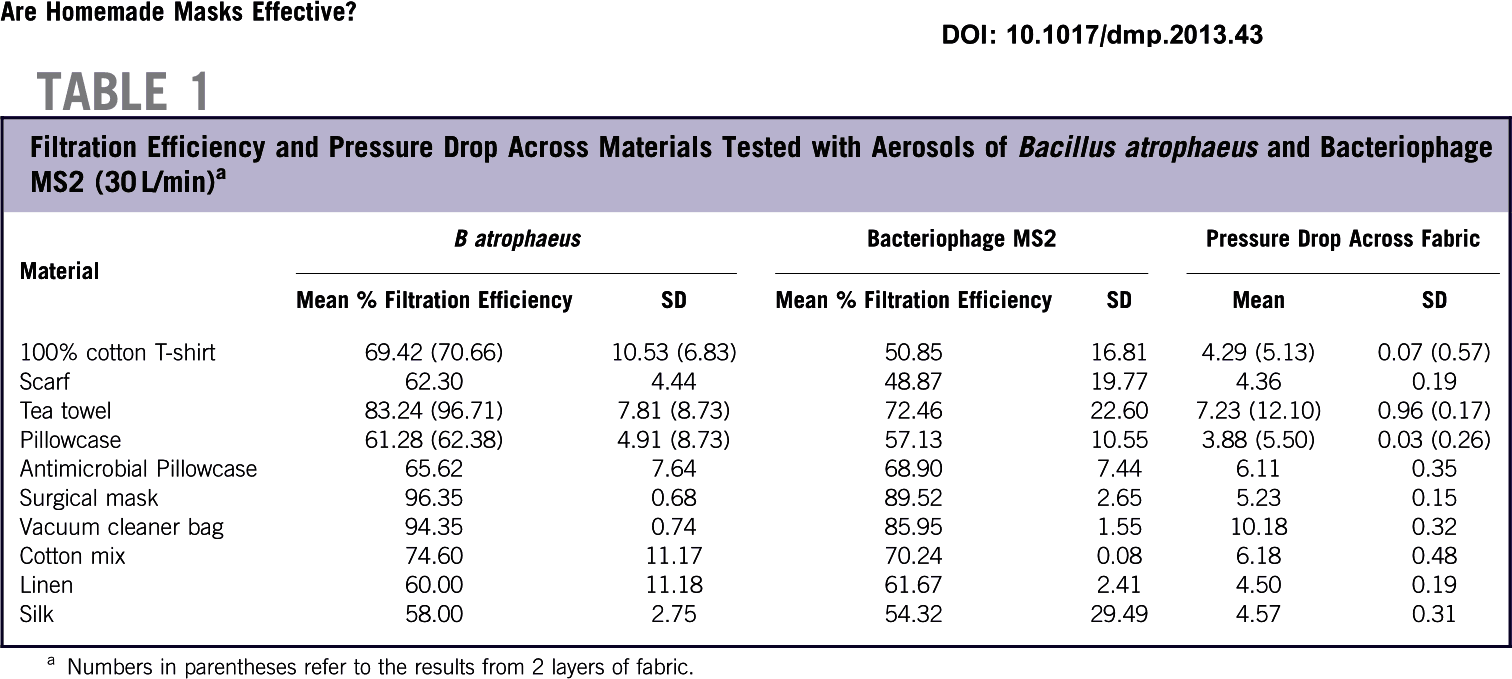
Household material effectiveness for masks
If you use, for example, a vacuum cleaner bag then it will have high efficiency at filtering particles but you may not be able to breath, provided your mask has a good seal–this renders the mask useless. Achieving high particle filtration while maintaining breathability is a hard problem without specialized materials. However, outside of a hospital setting, some protection is better than no protection.
If you are not planning on using the mask in a clinical setting or you are not in close proximity to an infected individual, you do not need to risk contracting the virus by going shopping for filter materials if you have something that is ‘good enough’ in your home already. If you are under state, county or city orders to shelter in place…don’t go shopping.
Step 4. Cut filter material
- Place mask over filter material. Use marker to trace out filter hole. Cut filters ~.5 inch or 1 cm larger than traced hole size.
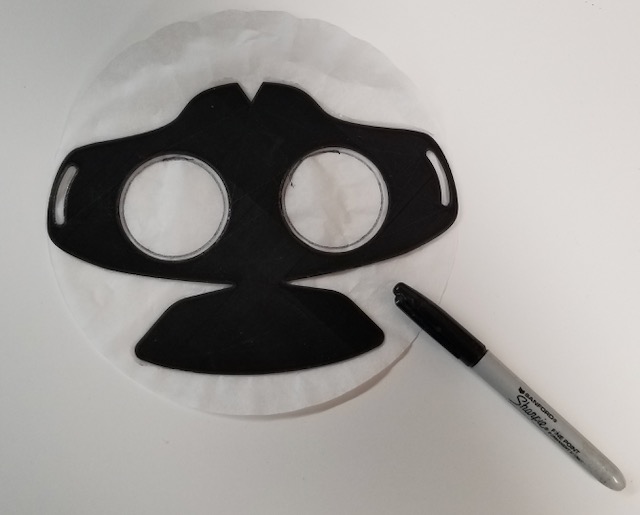
Trace filter holes on salt infused filter
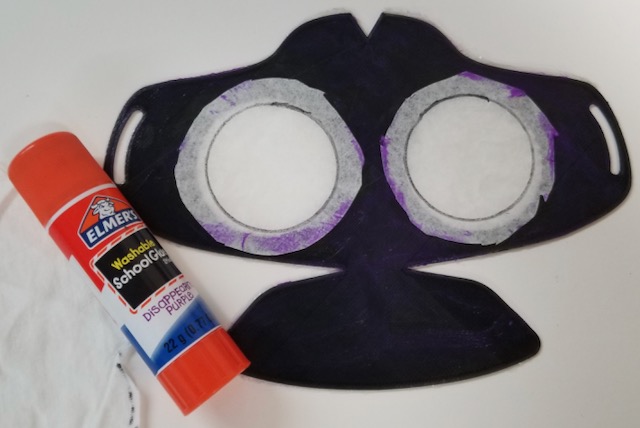
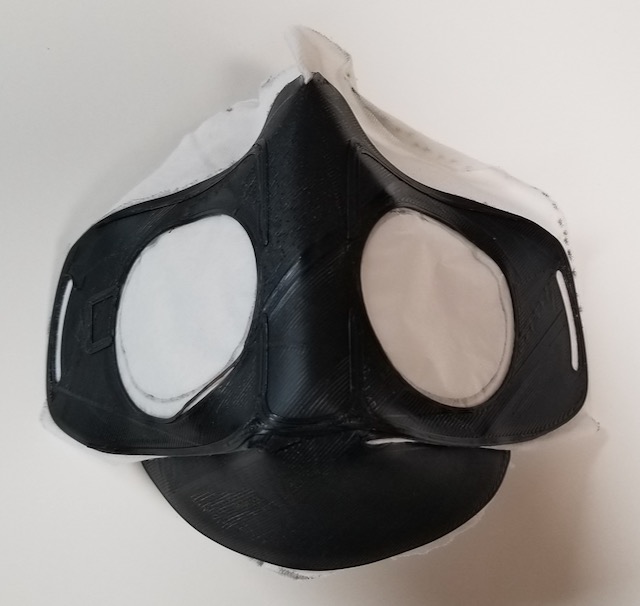
Step 5. Glue/attach filters over the back-side of the mask

Glue salt infused filters on mask
Note: Heat-welding with a soldering iron can also be used. Heat the filter material with a soldering iron, pressing firmly into the PLA. The PLA will melt and infuse into the fabric, strongly bonding them together.
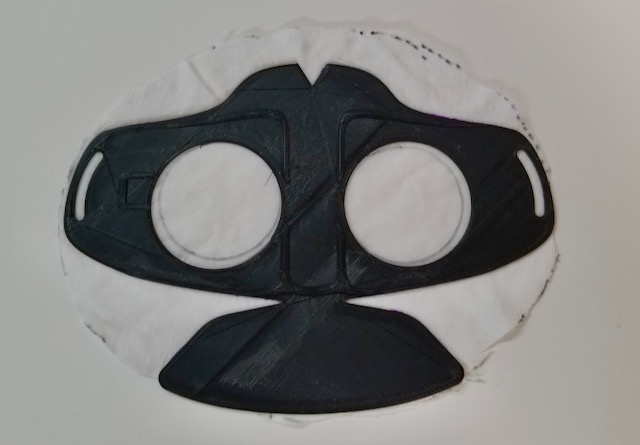
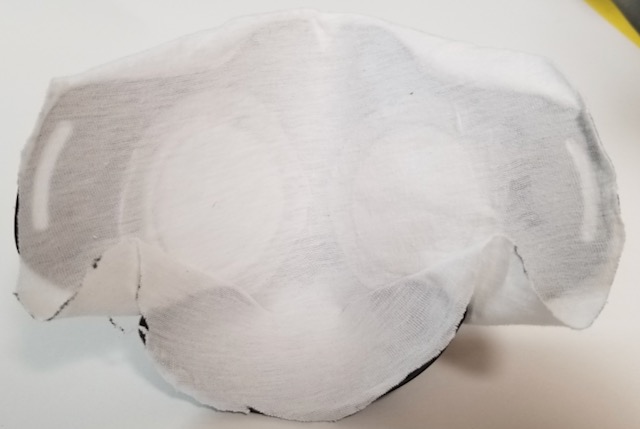
Step 6. Glue/attach fabric to backside of mask
Taking care not to get glue on the filter holes, apply glue to the rest of the backside of the mask.
Apply glue to backside of mask
Flip the mask over and press the back-side of the mask firmly into the fabric. Turn over and massage the glue into the fabric. let dry.
Glue mask to fabric
Note: Heating welding with a soldering iron can also be used. Heat the filter material with a soldering iron, pressing firmly into the PLA.
Step 7. Bend mask on midline
- Use a heat gun or hair dryer to gradually heat the mask across the midline, using the end of a table as a guide/assist. Let cool until mask is ridged again.
Use heat to bend 90 degrees on midline
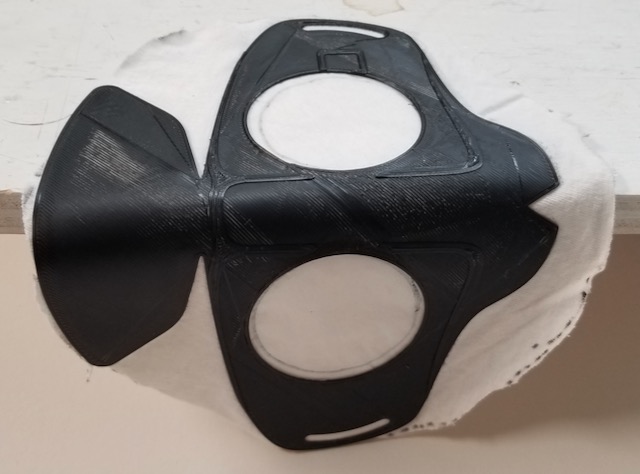
Step 8A. Bend chin flap up
Bend chip flap up
- Apply heat to the chin flap until it becomes pliable.
- Fold chin flap edges up and into the back-side of the mask under the jaw ridge.
- Re-heat and mold as necessary until the chin flap edges are tucked neatly into the back side of the jaw ridge.
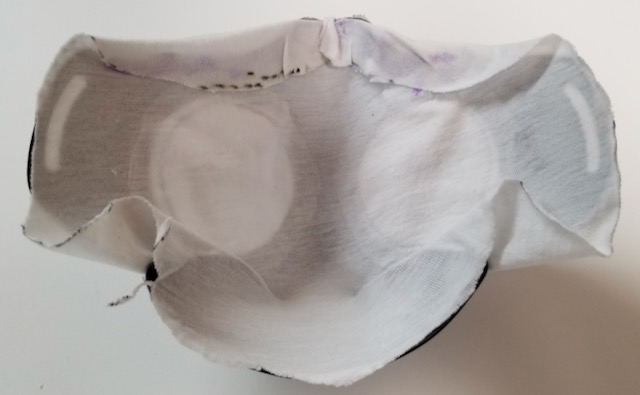
Back side of mask after folding chin flap
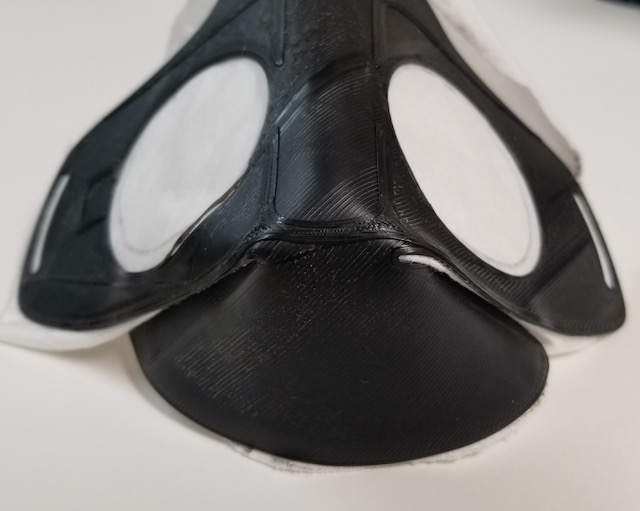
Step 8B (Optional). Seal Chin Flap to Jaw Ridge
This step is necessary to achieve a solid seal. Options for this include:
1. Apply non-toxic glue between chin flap and jaw ridge and let dry.
1. Heat-weld chin flap to jaw ridge with a soldering iron.
1. Apply tape over chin flap/jaw ridge joint.
1. Use hot-melt glue gun (ideal).
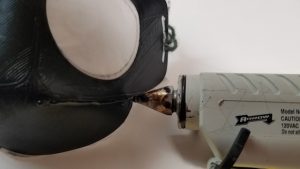
Seal chin flap to jaw ridge
Step 9. Form nose ridge
- Put on thin gloves (recommended but not required)
- Apply heat with heat gun or hair dryer to the nose ridge until it is pliable.
- Quickly place the mask on your face with chin firmly seated in chin flap and use both hands to push the nose ridge into your face. The goal is to mold the mask to your nose ridge and cheek as best as possible without burning your fingers (hence the gloves). The fabric on the mask will protect your face from the heat.
Form nose ridge
Step 10. Fold & glue/attach excess nose ridge fabric
- Apply glue to back side of nose ridge.
- Fold excess fabric down.
This step adds extra cushion to the nose ridge area and helps to form a better seal.
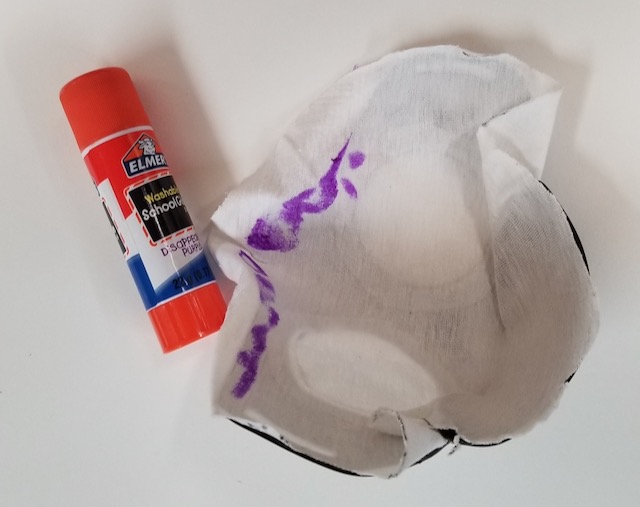
Apply glue to nose ridge
Fold excess fabric down on nose ridge
Step 11: attach tie-down chords to mask
- Cut the fabric in the side slots.
- Using whatever string, chord, bands, etc that you have, tie two loops.
- If you do not have elastic bands (preferred) you can use string/twine and slip knot:
Image source: https://www.netknots.com/rope_knots/slip-knot
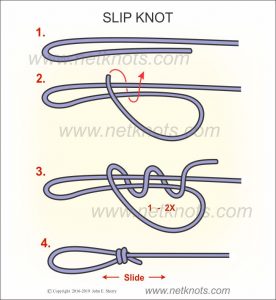
slip-knot-2
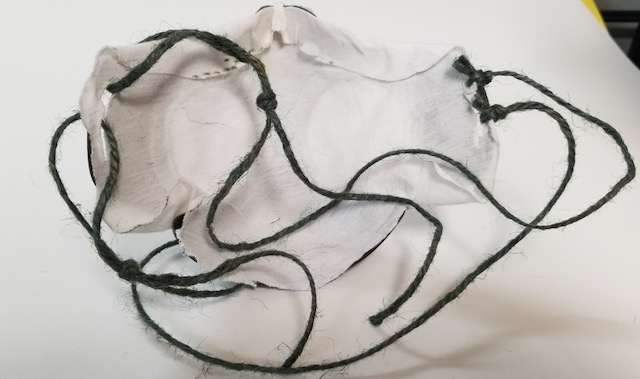
Tie down bands using slip knots
Another option is to 3D print elastic strap hook:
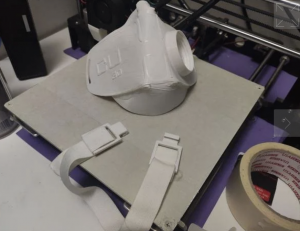
Elastic Strap Hook
Step 12: Fit Test
Put the mask on tight. Cover the filter holes with the palms of both hands and attempt to breath in. If you can’t breath, you have a good seal. If you can, apply heat to the mask and continue to mold it to your face where the air is coming in.
Note: Some air will come in the mask between the chin flap and jaw ridge unless you have completed step 8B.
Step 13: Use or give away
There is still debate about how long the virus survives on plastic, but most sources mention 2-3 days. That means that by letting the mask sit for 3 days before distributing them, you’ll greatly reduce risk of transmission.
If provided to somebody else, inform that person that they should use a hair-dryer to form the nose ridge and jaw flap to their own face to get a good seal.
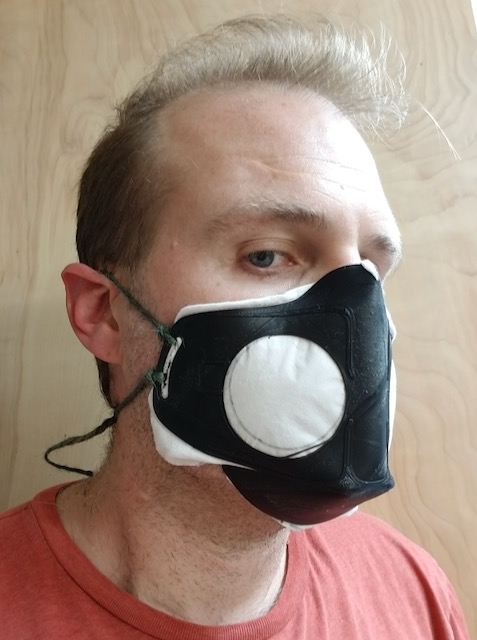
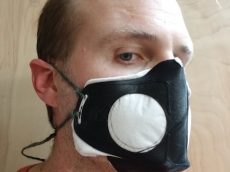
Finished N-95 Substitute Mask


5 Comments
Jerry Cubbison
Thank you Knowm for caring.
Danna
This is amazing. I quickly built this site to help: If anyone can offer 3d printing mask to our front line medical worker. You can publish your offers here. https://3dprintingmask.info/ hope it can help
Nightauthor
I noticed that the outside of the mask has some lines on it, do they surve any specific purpose? I was particularly curious because they are not symmetrical.
Alex Nugent
It’s just a quickly modified version of Copper3D’s initial design. The bit the end is their logo chopped off by the additional respirator vent hole.
Thereyouhaveit3d
I like your 3d mask printing, it’s very unique and valuable. I like your content and skills too. Thanks for sharing the Amazing content! If you wanna more about 3d printing go to the link:
https://www.thereyouhaveit3d.com/3d-printing-los-angeles