Index of DIY face masks click here
Overview
Note: David Troetschel of Wallfacer Design has made requested modification of design. Latest Mark 4 Design Files:
NOTE: Skip to Mark 4 design below for instructions on first viable build. Mark-4 is better ventilated, sealed and more comfortable.
In response to the urgent need for PPE equipment by health care workers around the world, a company from Chili that makes anti-bacterial 3D printer filament has released a design for a mask. The design has a number of key properties that make it a promising starting point. Notably: (1) ability to form-fit to face, (2) minimal use of filament and (3) quick print time. However, after printing and testing the mask it was clear that it was not a viable finished design and would need additional modifications and design improvement before it would offer any protection.
The company has clearly stated: “NanoHack is NOT a finished product ready to be used”. This article is an attempt to bring the NanoHack closer to a finished product under the following constraints:
1) Can be used comfortably in the absence of other options.
2) Can be built quickly by a typical maker with a 3D printer with materials on-hand. A fancy design is great if you have the time, materials and tools for it. But most do not.
There are two directions to go. The first is to bring the replaceable filter design up to function, Design A. We detail this design below. The second is to use the formable property of the 3D printed PLA mask as method of press-fitting a surgical mask or other cloth to the user face, thus improving the seal, Design B. We will follow up with design B in a future post.
Mark 1
Build
The initial design provided by Copper 3D was printed and assembled. To form the mask we boiled hot water and dipped the mask into it, making it pliable. We first bent the mask roughly 90 degrees along the midline. Next we formed the chin by bending it up. Finally we dipped the nose section into the water and then held it to our face and formed the nose section, almost burning our nose in the process. We then used Soft UV Cure resin to seal the mask and build up material in some gaps around the nose until a good seal was achieved. We used 1/4 of a cotton swab and a pice of tissue paper as a filter element and ditched the plastic waffle grid insert. We used the old elastic bands from a discarded N95 mask.
NanoHack Mask, Mark 1
The effectiveness of common household materials when used for masks is given below.
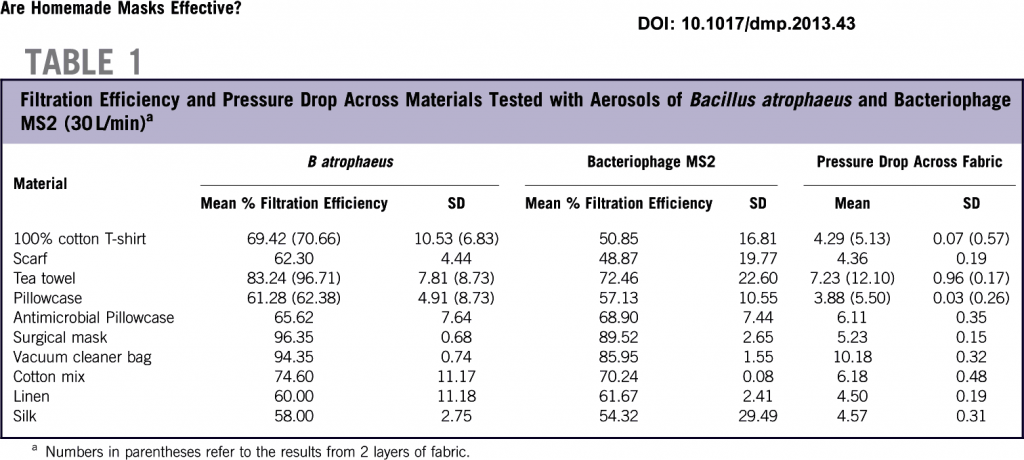
Household material effectiveness for masks
Test
Testing consisted of walking to check the mail up and down a small hill. Elevation was about 7000ft. The sealed mask did not provide adequate ventilation, making it difficult to breath. The hard PLA, especially around the nose area, make the mask uncomfortable, even after forming and addition of the soft cure resin. Both of these issues can be fixed.
Notes
- The mask uses relatively little filament. Very Good!
- The mask is formable, allowing customizations to different faces. Very Good!
- A considerable amount of time was spent printing the ‘waffle cone’ pattern, which we do not believe is needed as our recommendation is to attach cloth to the backside of the mask to improve comfort and seal as well as eliminate the issue of burning your face when form-fitting the mask).
Mark 2
The most significant issues (assuming you have good filter material and a seal) are (1) poor ventilation and (2) poor comfort around the nose area. We believe the ventilation issue can be resolved with a second modified filter port on the right side of the mask. The comfort issues can be resolved by fixing a layer of soft air-permeable cloth to the back of the mask.
Build
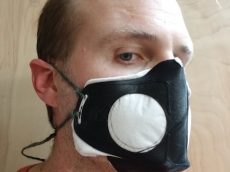
To test these ideas we drilled ventilation holes into the left side of the mask, applied adhesive to the back and attached a piece of cotton cloth from a discarded t-shirt.

NanoHack Mask Mark 2
Using an X-Acto knife, we cut the the excess cloth around the mask:
NanoHack Mask Mark 2
We used a heat gun applied briefly to the front of the mask to make it pliable for forming. Note that a hair dryer should also work. Forming the nose area was much more comfortable with this approach, as the cloth shields your face from the hot plastic.
Test
We tested the mask by holding it tightly to our face while running up and down some stairs. It was immediately clear that the mask still did not provide adequate ventilation. However, it was much more comfortable. The combination of form-fitting the plastic with the cloth backing results in a comfortable fit that could be worn all day. The cloth around the nose area resulted in a significantly better seal without the use of additional resins.
Mark 3
Build
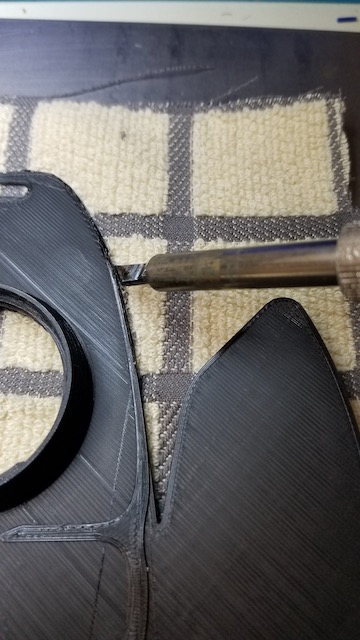
To improve the ventilation we printed another mask, but terminated the print just before the filter housing. We then cut out the waffle pattern and additionally cut an equal size hole on the right side of the mask. We then added a layer of cloth as before and formed the mask.
Test
We tested the mask by holding it tightly to our face while running up and down some stairs. The mask provide adequate ventilation and was comfortable. However, the residual fumes from the adhesive resin we used were noticeable and would not be acceptable for use. To resolve this, we heat-welded the fabric.
Mark 3.1 Adhesive Replacement Test
To overcome the adhesive fumes we tested a method of attaching the cloth with heat. It is possible to apply high heat temporarily to the PLA and press it into the fabric, or apply high heat and pressure over the fabric using a soldering iron. This causes the PLA to melt and infuse into the fabric, forming a strong bond that should be resistant to washing or disinfectant like alcohol, allowing the mask to be cleaned repeatedly.
Note: A soldering iron works, as does using the tip of a heat gun that has been previously run but is turned off. A wood burning tool will also work.
Note: It’s possible to use a soldering iron to melt the mask onto/into the cloth around the edge of the mask. Will demonstrate this for Mark 4.
Mark 3.1 Cloth folding Test
Using method 3.1 to attach cloth, we cut the cloth leaving excess around the chin area. We then folded the chin tab upward until it was ~90 degreed with the font of the mask and used a soldering iron to melt the PLA and weld the chin to the mask sides. This procedure creates a better seal around the lower portion of the mask.
Front-Bottom:
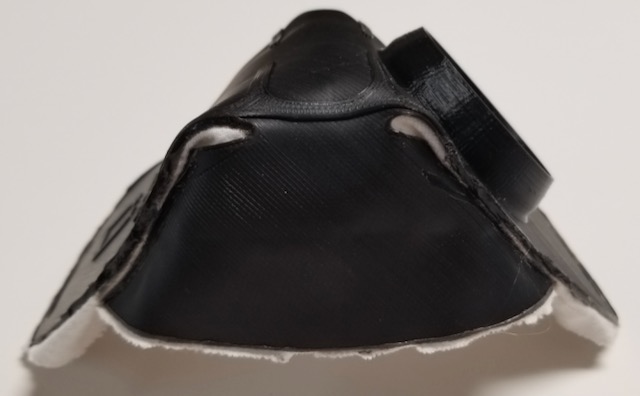
Chin flap folded back and heat-welded to mask front.
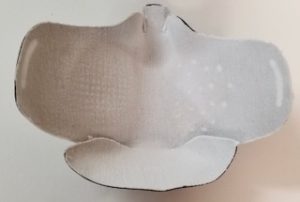
Back-Bottom:
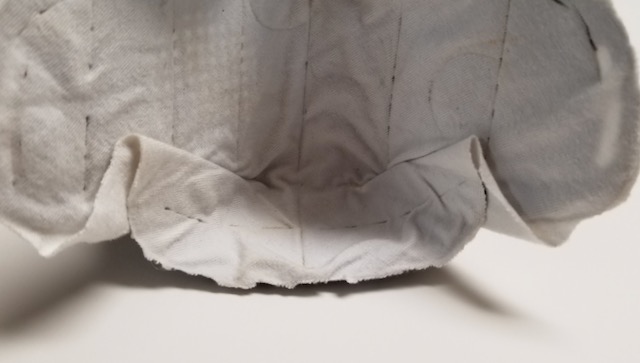
Chin with cloth folded
Mark 4
This appears to be the first viable design.
Tools Required:
- Heat Gun (or hair drier)
- Soldering Iron (or hot melt glue gun)
- Scissors
- Thin gloves (optional)
Materials Required:
- Fabric (see table 1 above for ideas).
- Elastic bands or cords.
3d printer files:
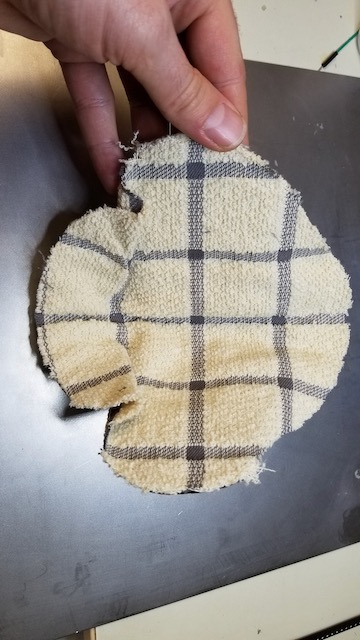
The fabric chosen must strike a balance between filter efficiency and pressure drop. A high efficiency does not work if the pressure drop is also high, as you will not be able to breath. For example, vacuum cleaner bag has high rating of 94.35 efficiency but requires a pressure drop of 10.18–twice that of a surgical mask. We chose an antimicrobial kitchen town as we already had it:
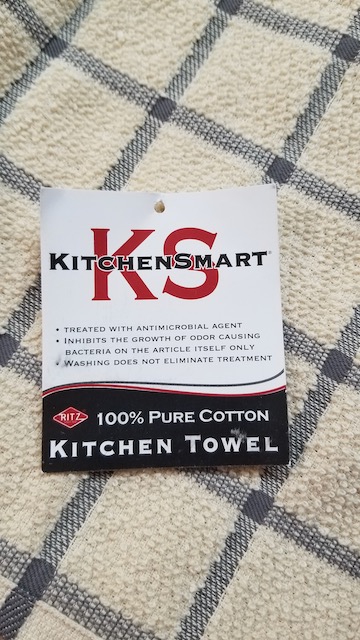
Kitchen Towl
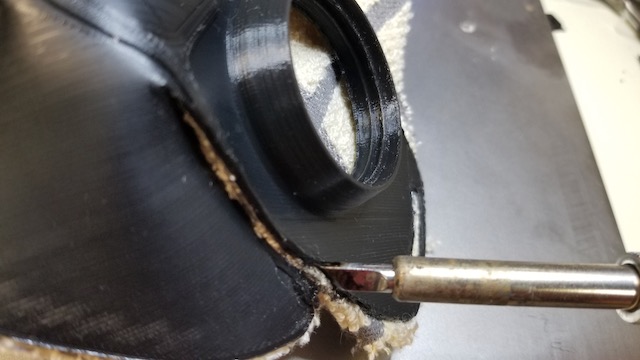
We placed the printed flat mask over a piece of the fabric and then used the soldering iron to weld the fabric to the edge of the mask. With the soldering iron tip between the mask and the fabric, melt the mask and press it into the fabric while it is still hot, moving in one continuous motion. Note: We attempted hot melt glue and this also worked in case you do not have a soldering iron.
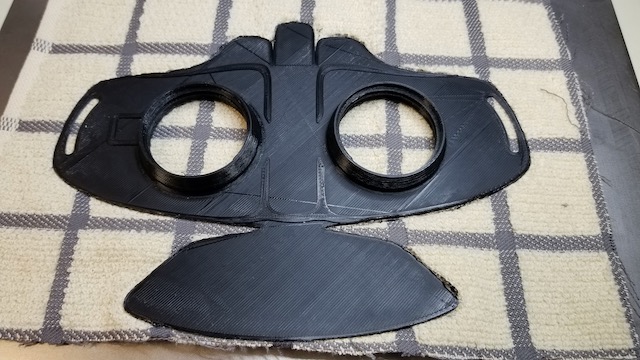
Fabric Attach
Fabric attach with soldering iron
With the fabric welded to the mask, we cut the fabric as shown below. Do not cut out the piece between the chin flap and the main mask, as this will be folded over to make a better seal.
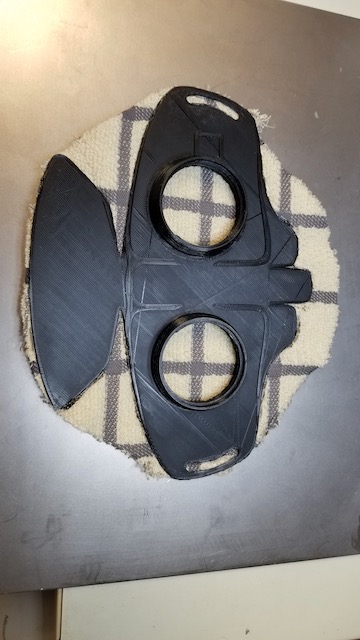
Rough cut fabric
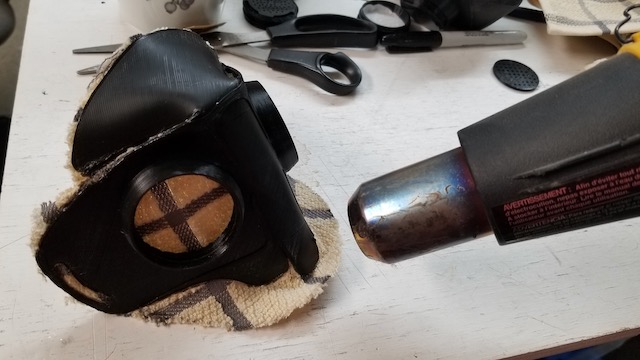
Using the heat gun or hair dryer, gradually raise the temperature of the mid-line of the mask. Apply enough heat so that it becomes pliable but not so much that it liquifies or otherwise deforms. Use a table edge or board and bend the mask around it to a little less than 90 degrees, as shown:
Midline bend using board edge as a form
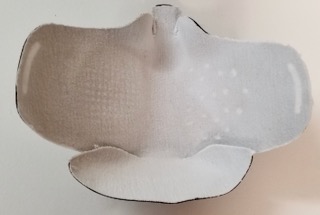
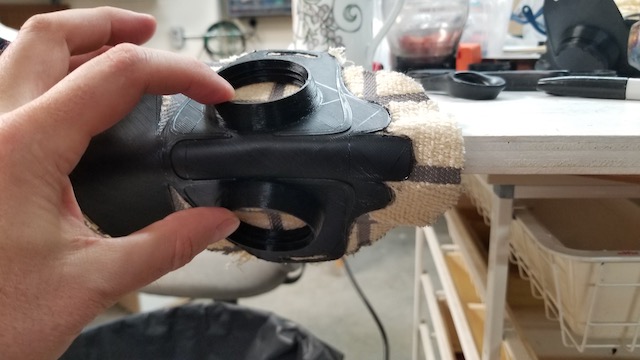
Once the mask has cooled, heat the chin flap until it is pliable and then bend it up, making sure the fabric is folded into the mask:
Bend chin flap up
Inside mask after bending chip flap
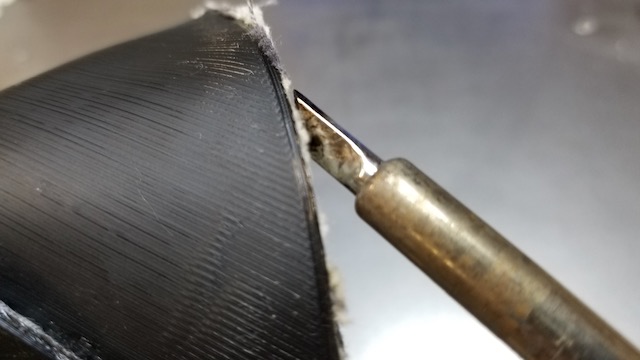
Using the soldering iron (or hot melt glue gun), weld the chin strap to the jaw ridge:
Weld chin flap to jaw ridge
Carefully apply heat to the nose tip and cheek ridge until it is pliable. Quickly place the mask on your face and use both hands to press into the right and left of your nose (but not the nose ridge) as well as your cheek ridge. Try to push the mask flush against your face. Due to the fabric, your face will not burn. However, you may want to wear gloves as your fingers will be exposed to the hot plastic. If you are careful and do not excessively heat the mask you do not need gloves.
Apply heat to nose flaps and cheek ridge
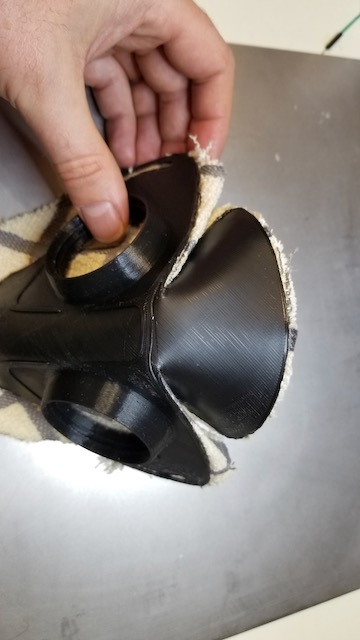
It should look something like this:

bent cheek ridge
Now heat the nose tip and bend it inward to match the slope of your nose:

Bend nose flap
To finish the mask, cut the excess fabric from the sides and then use the soldering iron to melt the ends into the fabric. This will further secure it and clean up the edges.
weld the edges
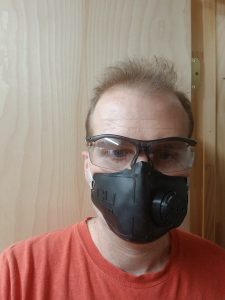
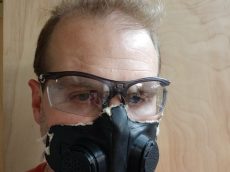
Finally, cut out extra cloth to use as a filter elements and push them into the filter caps. Screw the filter caps into the mask and tie elastic bands or cords. All done! This design enables sufficient ventilation as well as a good seal around the node, cheek and chin. It is also very comfortable–I could wear this all day if I needed to. I believe this design could be repeatedly disinfected or washed and the filter elements replaced.
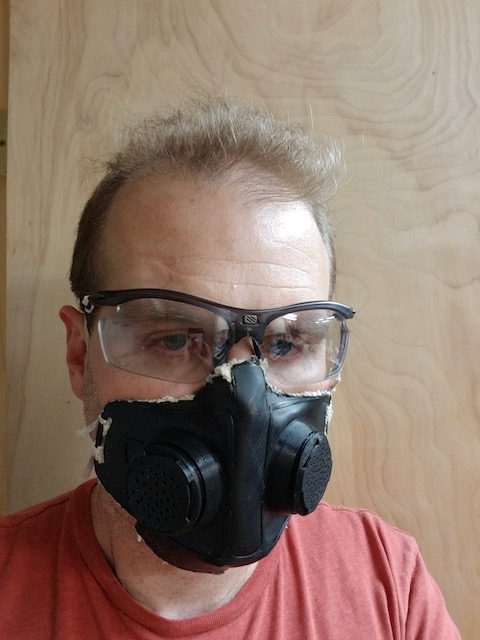
Finished respirator
Please leave comments or suggestions below if you have concerns, ideas, etc.
Next Step:
Further simplify this design and make disposable masks or re-usable ‘worried well’ masks. The print time for the filter inserts and receivers is too long. If we only print the masks and use fabric as a filter, doubling up the fabric over the vent holes, we should be able to print and assemble a mask in 1-2 hours.


1 Comment
Jesse
From an old chem bio guy two additions I am going to do are first, there’s rubberized sealant for doors and windows you can add around the mask to get a proper seal. I might even get rubberized filament to try for an add on lip similar to actual masks. Second, the two filters are great breathing always sucks and heavy breathing can lift a mask off your face like this. An outlet valve like a regular chem/bio mask at the bottom to expel excess saliva and spit would make it useable all day long. Standardizing the side of the mask with CPAP filters already rated for bacteria and viruses is something I’m looking at doing. But honestly this looks like the best design I have seen so far, sleek, clean, isn’t bulky and does the job.