Index of DIY face masks click here
Disclaimer! This mask has not been tested in a clinical setting. It is a canidate design that can be made at home quickly with a 3D printer and commonly available tools and materials. It should only be used when commercially available masks are not available. If you have N95 masks please donate them to your local hospital and make a mask for yourself. If you have ways to make this better using materials available to you, please do it and share. If you have concerns, please share.
Overview
In response to the urgent need for PPE equipment by health care workers around the world, a company from Chili that makes anti-bacterial 3D printer filament has released a design for a mask. The company has clearly stated: “NanoHack is NOT, a finished product ready to be used”. However, the design has some key properties that make it a promising starting point. In this article we provide modifications to better suit healthcare workers: achieving a better seal, much more comfortable, and better ventilation. This blog article is an attempt to bring the NanoHack closer to a finished deployable mask under the following constraints:
1) Can be used in the absence of other options.
2) Can be built quickly by a typical maker with a 3D printer with materials on-hand.
You can read about our initial tests here.
Big thanks to David Troetschel of Wallfacer Design for making the modifications to the Copper 3D NanoHack design.
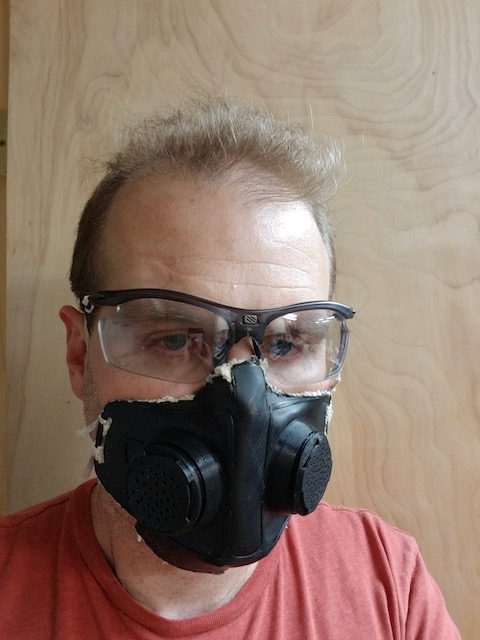
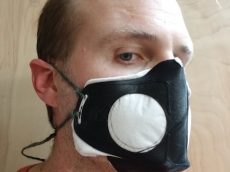
Finished respirator
COVID-19 Emergency Respirator Mark 4
Tools Required:
- Heat Gun (or hair drier)
- Soldering Iron (or hot melt glue gun)
- Scissors (or X-Acto knife)
- Thin gloves (optional)
Materials Required:
- Fabric (see table 1 below for ideas).
- Elastic bands or cords to use as ties.
3d printer files can be download here:
Note: you must ‘mirror’ the Filter Cap to match the mirrored threads in the mask. In Ulti-Maker Cura, duplicate the filter cap, press the “M” key and click on the x or y arrow to mirror around the axis.
Fabric & Filters
What Are The Best Materials for Making DIY Masks?
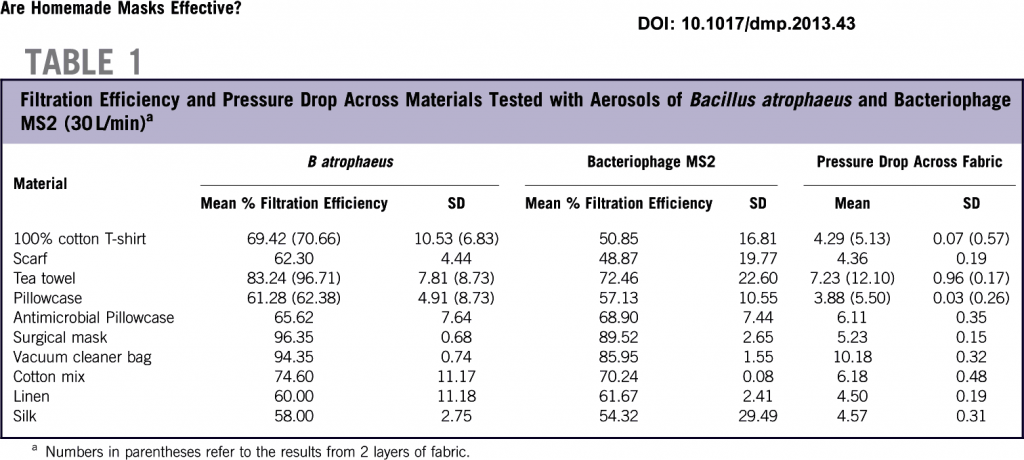
Household material effectiveness for masks
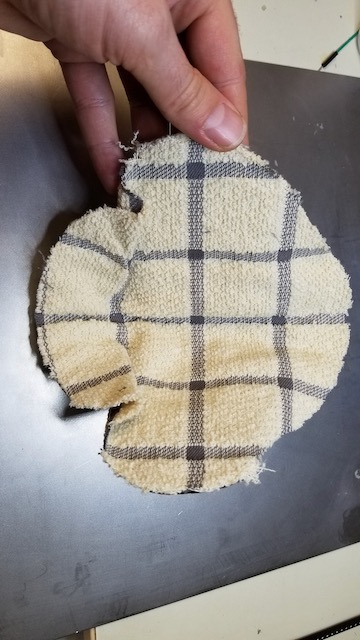
The fabric you choose must strike a balance between filter efficiency and pressure drop. A high efficiency does not work if the pressure drop is also high, as you will not be able to breath. For example, vacuum cleaner bag has high rating of 94.35 efficiency but requires a pressure drop of 10.18–twice that of a surgical mask. We chose an antimicrobial kitchen town as we already had it:
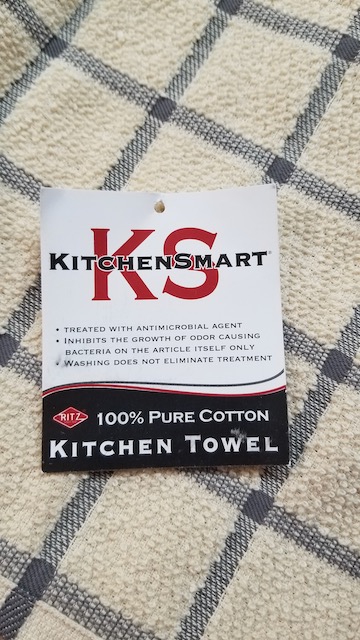
Kitchen Towl
We placed the printed flat mask over a piece of the fabric and then used the soldering iron to weld the fabric to the edge of the mask. With the soldering iron tip between the mask and the fabric, melt the mask and press it into the fabric while it is still hot, moving in one continuous motion. Note: We attempted hot melt glue and this also worked in case you do not have a soldering iron.
Fabric Attach
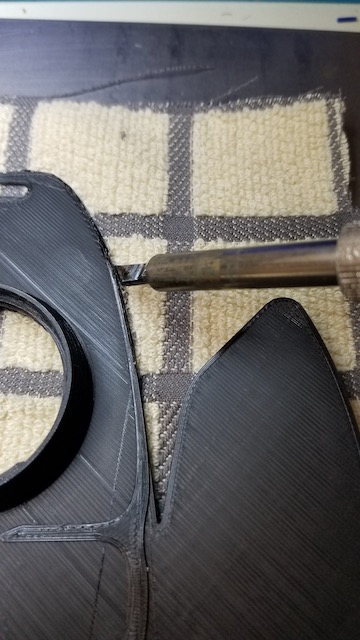
Fabric attach with soldering iron
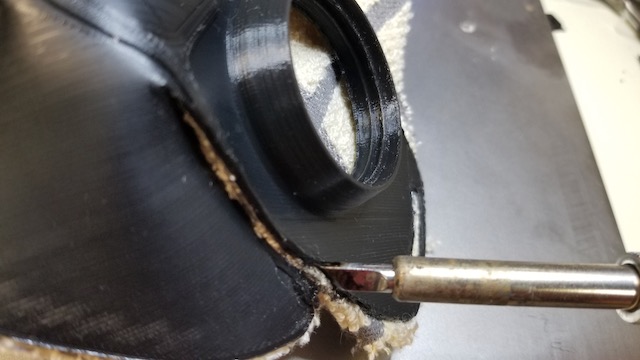
With the fabric welded to the mask, we cut the fabric as shown below. Do not cut out the piece between the chin flap and the main mask, as this will be folded over to make a better seal.
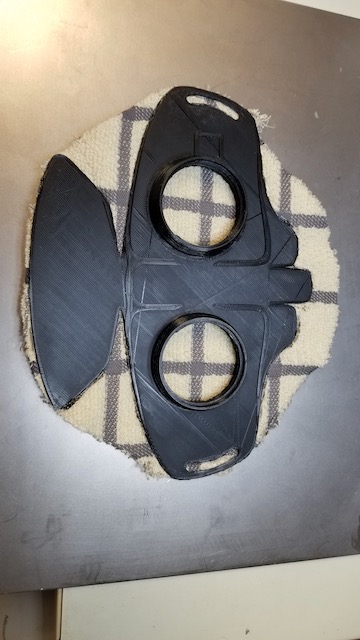
Rough cut fabric
Using the heat gun or hair dryer, gradually raise the temperature of the mid-line of the mask. Apply enough heat so that it becomes pliable but not so much that it liquifies or otherwise deforms. Use a table edge or board and bend the mask around it to a little less than 90 degrees, as shown:
Midline bend using board edge as a form
Once the mask has cooled, heat the chin flap until it is pliable and then bend it up, making sure the fabric is folded into the mask:
Bend chin flap up
Inside mask after bending chip flap
Using the soldering iron (or hot melt glue gun), weld the chin strap to the jaw ridge:
Weld chin flap to jaw ridge
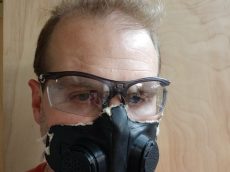
Carefully apply heat to the nose tip and cheek ridge until it is pliable. Quickly place the mask on your face and use both hands to press into the right and left of your nose (but not the nose ridge) as well as your cheek ridge. Try to push the mask flush against your face. Due to the fabric, your face will not burn. However, you may want to wear gloves as your fingers will be exposed to the hot plastic. If you are careful and do not excessively heat the mask you do not need gloves.
Apply heat to nose flaps and cheek ridge
It should look something like this:

bent cheek ridge
Now heat the nose tip and bend it inward to match the slope of your nose:

Bend nose flap
To finish the mask, cut the excess fabric from the sides and then use the soldering iron to melt the ends into the fabric. This will further secure it and clean up the edges.
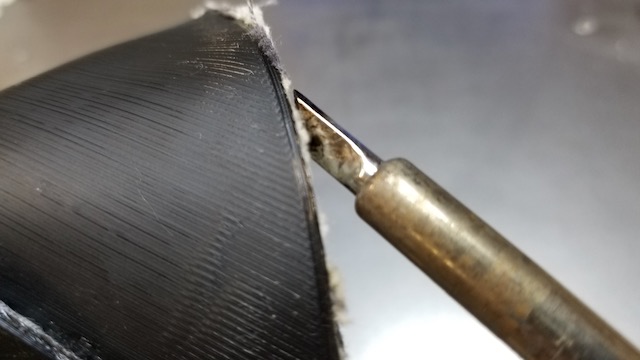
weld the edges
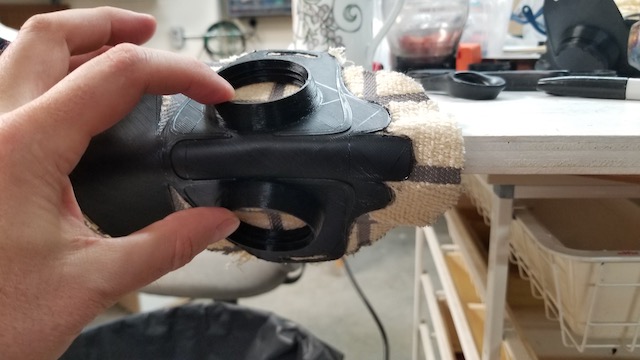
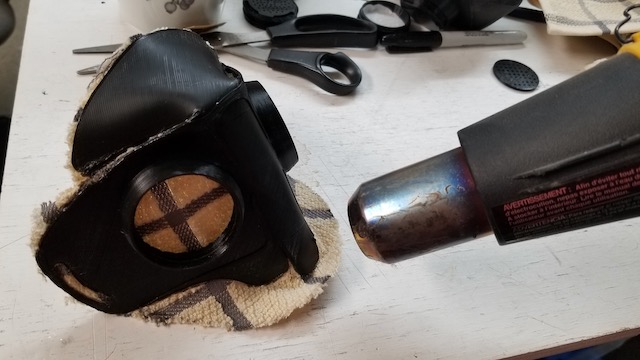
Finally, cut out extra cloth to use as a filter elements and push them into the filter caps.
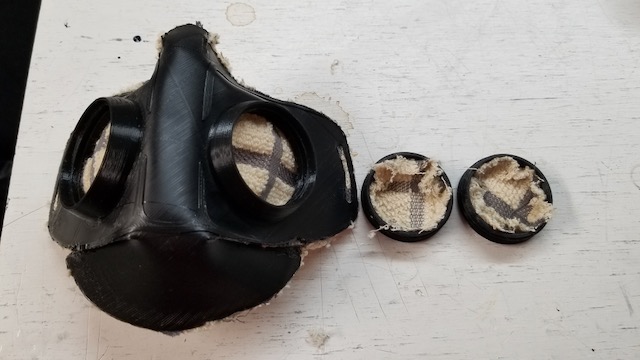
Fill filter inserts
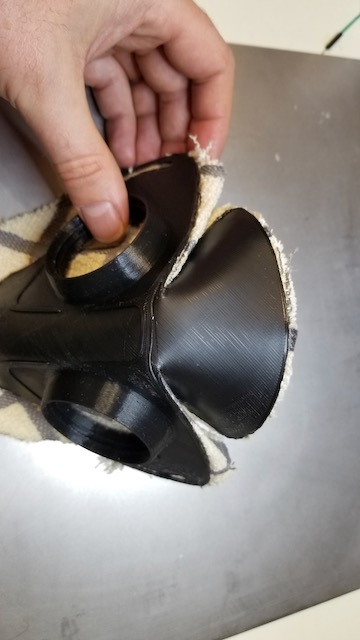
Screw the filter caps into the mask and tie elastic bands or cords. All done! This design enables sufficient ventilation as well as a better seal around the nose, cheek and chin. It is also comfortable–I could wear this all day if I needed to.
Please leave comments or suggestions below if you have concerns, ideas, etc.
Next Step:
Further simplify this design and make disposable masks or re-usable ‘worried well’ masks. The print time for the filter inserts and receivers is too long. If we only print the masks and use fabric as a filter, doubling up the fabric over the vent holes, we should be able to print and assemble a mask in 1-2 hours.


2 Comments
Sal
Nice mask. I’ve printed 2 so far. The second one I printed directly to the fabric. It’s pretty easy if its a thin material, I used a T-shirt. The print head could be adjusted for a thicker material. I also increased the temp of the first layer so it really stuck to the material and then hit it with an iron when it was finished to really seal it.
Alex Nugent
I was wondering if you could print directly on the fabric! Thanks for the comment, very helpful.