For many applications such as real-time stock prediction algorithms or brain simulations, there is a need for extremely fast and massively parallel computing. My friend, Alex Nugent, and I needed some enormous computational power for some projects we are working on and wanted a cheap and elegant solution. We already built a handful of dual-core headless Linux boxes and added them to our local network, but we could see that adding more would not go too far because of space limitations. What we needed was a compact and efficient design with maximal core density. Rack mountable servers were quite expensive relative to a hand-built quad-core Linux boxes. We imagined there existed some kind of cabinet that would be perfect for housing a bunch of computers. Each host in the cluster would consist of the bare minimal of components for our applications with a main emphasis on fast processing and less on RAM and hard drive capacity. The enclosures for each host would have to hold a motherboard, power supply, RAM, CPU w/ fan, and hard drive.
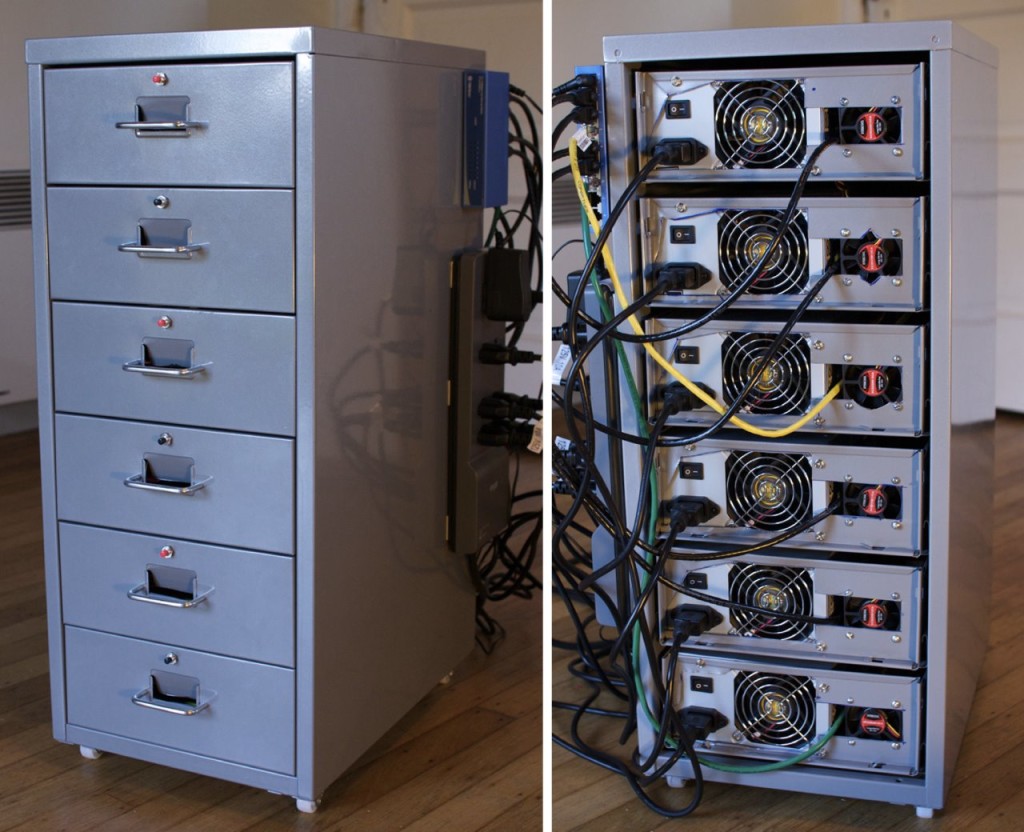
Helmer Final Build
I looked around on the Ikea website and after an hour, I pared down all possible furniture pieces to Helmer. About five minutes later, I checked out Digg, and the third story from the top was coincidentally about a guy in Sweden who built a Linux cluster into a Helmer cabinet. The very next day I received an IKEA advertisement showing Helmer on sale for only $29.99 from $49.99. At that point, I was sure that the Helmer cabinet was meant to be the future case our our cluster, and I picked it up the next day! The following is an illustrated guide to building your own 24-core Linux cluster in pictures.
| Quantity | Component | Price |
|---|---|---|
| (1) | Ikea Helmer Cabinet | $29.99 |
| (6) | BioStar TForce TA780G M2+ Motherboard | $79.99 |
| (6) | AMD Phenom X4 9850 Black CPU | $169.00 |
| (6) | Antec EA380 380 W Power Supply Unit | $59.99 |
| (6) | Toshiba 80-GB Sata2 Laptop Hard Drive | $49.99 |
| (6) | G-Skill 1GBX2 DDR2 RAM | $42.99 |
| (6) | EverCool 50mm Case Fan | $3.79 |
| (6) | 3-foot LAN Patch Cables | $1.49 |
| (1) | 8-Plug Surge Protected Power Strip | $39.99 |
| (1) | TrendNet 8-Port Unmanaged Switch | $18.49 |
| (6) | Linux Operating Systems | $00.00 |
| Misc. Parts | $20.00 | |
| Total | $2550.11 |
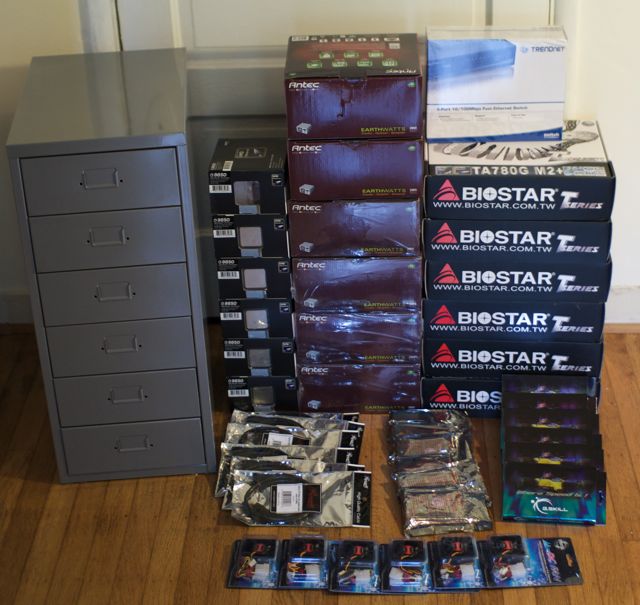
Helmer Components
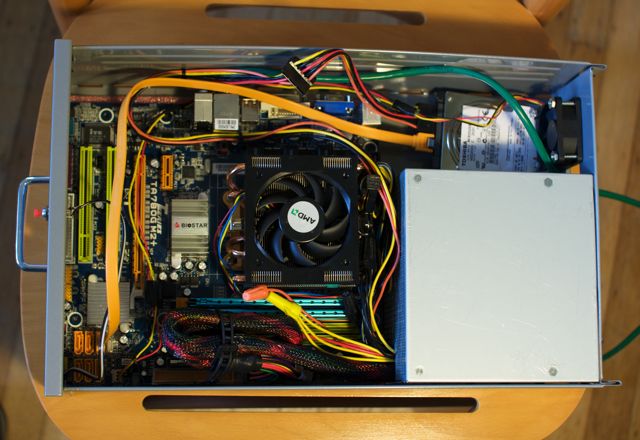
Component Layout
We wanted to keep Helmer’s drawers as intact as possible in order to maintain a sound and stable finished product. Besides just looking clean and elegant, building each host into a single drawer organizes and modularizes everything nicely for future maintenance. I wonder if the Helmer designer at Ikea made the drawers exactly for this because the components fit inside perfectly without a millimeter to spare in some instances. The power supply, which is a 380 W full size ATX PSU sits flush with the top of the drawer. The micro-ATX mobo (motherboard) fits in the rest of the space with about a millimeter to spare from front to back and about a centimeter on the left side of the drawer. A regular 3.5 inch form factor hard drive won’t fit in the remaining space next to the PSU, so we ended up going with a 2.5 inch form factor laptop hard drive. It fits almost perfectly with a few millimeters to spare. The distance from the CPU fan to the bottom of the above drawer is about 2.5 cm. All the cabling fits beautifully after we removed some of the unnecessary power lines from the PSU. Always take Electrostatic Discharge (ESD) precautions when handling any printed circuit boards or raw circuitry.
Helmer Drawer
Case Cooling
Since the PSU fan blows air out the back of the drawer, we designed the rest of the cooling system so that air would move from the front and out the back. We made cutouts for the PSU and an additional 50 mm case fan on the back of the drawer, and we modified the label holder on the front of the draw to let air in. Holes were drilled to attach the PSU to three of the four attachment points and all four attachment points for the case fan. There is enough space between the PSU and the case fan for the LAN patch cable to exit. After a bit of trial and error the easiest way to cut the correct shapes in the back of the drawers is to use a cut-cut-score method. After you have the cutout pattern drawn on the sheet metal, you take a sheet metal snips and make two cuts on two sides of a triangle. For the third side of the triangle, score the metal with a razor blade and bend the metal back and forth along the score line until it snaps off. Repeat that until the entire cutout is achieved. The front air inlet port is very easy to create. Insert a hack saw blade into the label holder on front of the drawer and cut along the bottom edge to the other side. Bend the flap of metal back into the drawer.
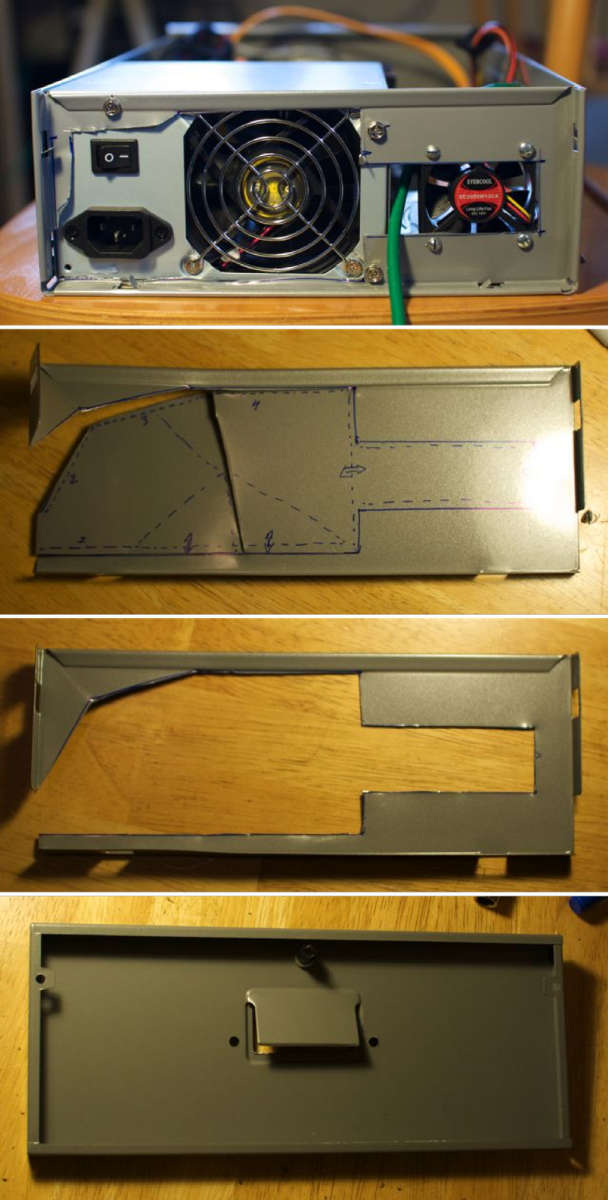
Helmer Case Cooling Mods
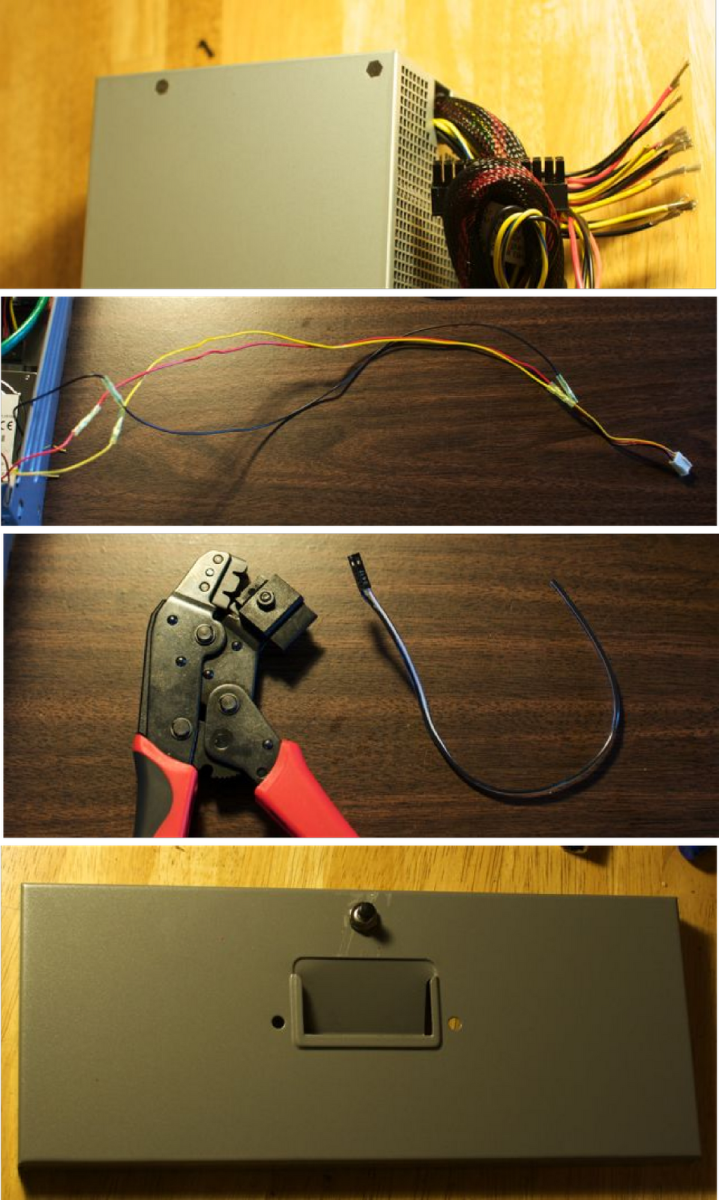
Modifications
The power supplies we bought had a lot of extra power wires coming out of it than we needed and they took up valuable cooling space inside the case. We decided to cut all the wires we didn’t need and toss them away. After cutting the unnecessary wires, you need to terminate the ends some way. We attached all similar-colored wires together and terminated the end with a wire nut. Make sure to screw the wire nut on very tight and also attach it with some electrical tape so it can’t accidentally come off. If for some reason in the future, one of these wires escapes and touches the mobo or the case, the entire cluster could be fried! We also added a push-button power switch to the front of the case. Make sure to get normally-off momentary push button switches. You need to drill a hole for the switch in the front of the drawer, solder a wire to the switch, and attach a Molex connector to the other end of the wire to attach to the on/off jumpers on the mobo. Since the cluster is designed to be headless (no monitor connected, managed remotely), it’s OK that it’s impossible to connect external hardware to the mobo except for the LAN patch cable. Because of the tight quarters between the LAN port and the side of the drawer, we had to modify the LAN patch cable by removing the plastic cable wrapping directly behind the clear plastic plug with a razor blade so that the actual wires could bend 90 degrees after exiting the connector. Finally, you need to extend the length of the case fan wires using simple crimp-style wire connectors.
Other Helmer Modifications
Final Steps
Before you put all the computer parts in each drawer case, you need to piece the computer together on a table and modify a few BIOS settings and install an operating system of your choice with an optical drive. Otherwise, after you have all the components in, it is a bit difficult to hook up a monitor, keyboard and mouse to the mobo because of the tight space. We adjusted the BIOS settings to enable the Wake-On-LAN feature, which I blogged about previously here. We installed Xubuntu on each host. While I’m sure there is a different flavor of Linux more appropriate for a headless Linux host, we went with Xubuntu because we’re comfortable with it. If you have a suggestion of what OS would be better, please leave a comment. The only constraint is that we need to be able to run a Java program. After you have all the hardware and software modifications complete, put all the components into each drawer and into the Helmer cabinet. Connect each PSU and the router to the power strip and each host to the router. Plug the router into your local area network (LAN) and you have 24 cores more at your service!
While we have not yet quantified how “fast” our cluster is, we have been able to finish our computations roughly 24 times faster than one of our single core computers, which translates to an immense gain in productivity. That means, what would take 24 hours before can be accomplished in one hour. We still want to play around with some over-clocking, and we’ll ramp up to that eventually. At idle speed, the CPU temps are are around 30 degrees Celsius. With all 24 cores at 100% load, the CPU temperatures stay at a nice and warm temperature of about 45 degrees Celsius. The air flow through the drawers sufficiently keeps the components cool, and at full tilt, you can feel a strong warm breeze come out of the rear of Helmer.
Other Thoughts
The idea of building a 6-host 24-core cluster in such a small space for such a low price tag of $2550.11 is very attractive not only for specialty applications, but also for businesses or educational departments looking to invest in a handful of servers. With Linux desktop and server operating systems such as Ubuntu forcefully emerging on the scene and taking away market share from Microsoft, people will inevitably embrace these faster, safer, easier and more elegant computing systems. That, in combination with compact, reliable, and inexpensive computer hardware will pave the way to better systems at any scale. I’m guessing that using Helmer cases and quad-core AMD processors, one could build the world’s fastest and most efficient super computer at a fraction of the cost of the next fastest. Perhaps a “Helmer” will someday become a unit of measurement defined as “six computers in 2.65 cubic feet” or something like that.
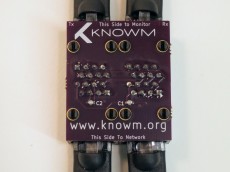
Are you interested in the cutting edge of AI processors? Read how to build the Ex-Machina Wetware Brain and learn about the Knowm Technology Stack.
Related Material
Why Would Anyone Need a Computer Cluster?
Photo Gallery of Helmer Build


2 Comments
Alex Nugent
Lol! Im glad you found that Tim!
For those who want the back-story, Tim and I were involved in an automated stock trading company for awhile. We built and deployed the system live with ~$500k of investor money. It was fully automated. I decided to go on a road trip and let it run. Then the financial crash of 2008 happened while I was on my road trip. Since the market was changing so fast we needed more compute power to evolve and train trading algorithms to keep up. I ended my road trip abruptly in Seattle, where Tim was living at the time. We had the computer parts shipped to his place, and we built Helmer. I then drove all-night back to Santa Fe NM to plug it into our network. The result? In the month during and after the financial crash, our algorithm learned to stop trading. (face palm!)
All of Helmers Mobos are now out of commission…the last one was turned off in 2015. The cabinet is now used by Hillary for art supplies. ‘Helmer Node’ is now our code word for “a linux host’
Roman Kretzschmar
Thanks for this summary. I searched for sth. like this since a week now. I’m 16 years now and interested in this. Maybe I’ll build a cheaper Version ;-). Your a great Help!!!!